How to Build a Board/Batten Fence
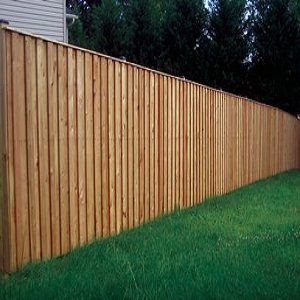
Fences substitute walls by offering privacy, security and seclusion. They are also easier to build, especially if you are using wood, the most favorite material for fencing. A board/batten fence can be your defense against any kind of mischief, be it human or animal. It also gives a beautiful border to yards and gardens. A board/batten fence employs an age old simple installation technique, passed on through generations and still famous today. It is time exhaustive, depending on the length of the fencing you wish. Before starting, gather all the materials required and go through our step by step guide.
Things Required:
– Post hole digger
– Carpenter’s level
– Shovel
– Trowel
– Fence posts and sections
– Fence stringers
– Galvanized or rust-resistant nails
– Gravel
– Ready-mix concrete
– Stakes and string


Instructions
-
1
Prepare the Location:
Mark the area you want to fence by strings and stakes. This will help you formulate your plan. Mark the point where you will insert your first post. Insert a stake here. Use a string and tape measure to mark the second post, eight inches from the center of the first one. Connect them using a taut string. Keep adding stakes until you cover your length. The measurement between two stakes could be anywhere between five to eight inches.

-
2
Dig Holes:
Use the post hole digger to dig holes for the posts at the marks where you had inserted stakes. These holes should be 1/3rd as deep as the length of the boards. Add 6 inch layer of gravel to the base of the hole and tam it down. Do this for all the posts so that you have the holes prepared for installation.
-
3
Insert Posts:
Make the concrete mix first using packet instructions. The concrete will help secure the posts in the ground. Set the post inside the hole over the gravel, ensure that it is level and pour in the concrete mixture. Do it for all the holes and posts. Check for level once again and make adjustments accordingly.
-
4
Add Base Plate:
A base plate helps you strengthen your sections, to be installed. Nail down your base plates to the posts using non corrosive nails.

-
5
Add Sections:
Let the concrete set in for around two days. After it has gone dry, install the sections between the posts. Nail the section boards to the sides or top of the posts using corrosion-resistant nails. Keep using the level to ensure that the system is level.


