How to Apply an Embossed Wallpaper
Ceiling wallpapers are now an important part of the decoration system of any house in this era and embossed wallpapers are one of the most common types of these wallpapers that are in wide use these days. Embossed wallpapers have now become an important part of any room and a room is not considered as complete unless it has beautiful embossed wallpaper. The wall paper makes the room look tidy and alluring as far as the aesthetics of the room are concerned. However, the wallpapers being soft are prone to get damaged with the passage of time and this problem is common with almost all of these ceiling wallpapers. Hence constant treatment and protection is advised for these entities in order to keep the room with the desired looks and in a presentable condition. There are a number of ways in which these wallpapers can be treated to be preserved and certain steps need to be followed to achieve this task and the right results.


Instructions
-
1
The first and foremost step in the treatment schedule is to set a work table for the task. This table must have ample length and height so that the working becomes easier. The length and height of the table must be kept at a possible maximum as with these two attributes, the working can be done in a speedy manner as longer length ensures that greater area is covered in one go, with the prospect of the moving the table again and again. The height must be adequate as well as it will be easy for the person to reach the ceiling with his hands. Compromise in these two cases can ultimately result in a compromise on the factor of safety.

-
2
Now you will have to set up the surface of the ceiling. In doing this, any pre-existing wall covers must be removed. After doing this, the surface that has been resultantly shown must be cleaned using sandpaper and some adhesives to make it smooth.

-
3
Now you will have to test the surface for any loose paint that exists on it already and it should also be removed along with any other marks on the place. A cleansing agent may be used for this. After doing this, let the place dry for at least 24 hours for achieving best results.

-
4
Now run a straight line chalk on the wall. The lines that have been marked on the exact locations should be according to the measurements for the fact that they might overlap each other and interfere with the beauty parameters of the task.

-
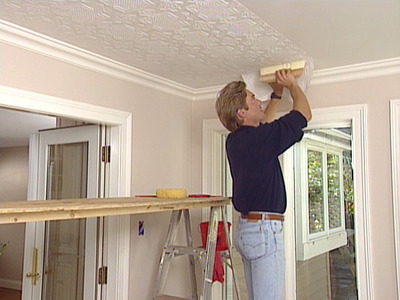
5
After this, roll the wallpaper on the marked lines and press it. Please make sure that too much force is not applied on it as it might destroy the embossing. Leave it for 10 minutes now and apply the adhesives. Finally set the wallpaper in place and press it so that it sets where it is required to after this, line up each strip and remove any wallpaper that is in excess so that the tediousness is kept in regard. Apply the finishing paint and the task is achieved.


