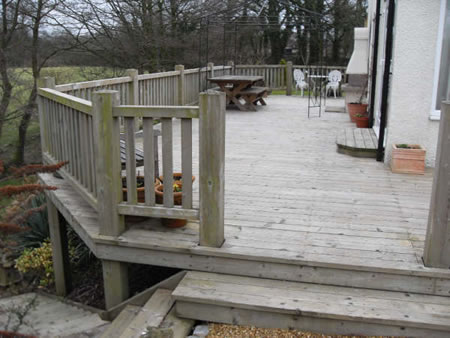
How to Build a Raised Deck
Having a deck in your house can prove to be a nice place for relaxing and also entertaining yourself. However, apart from the way you have built the deck and are using it, it is its design that actually matters. Two different decks can possibly have the same look but the construction techniques used may be different in each case. Hence if you have a home built relatively higher off the ground, then you should always be going for the raised deck option. It may possibly take you a few days to build a raised deck, but besides being something practical, it also adds up to the beauty of your house.
Things Required:
Lumber
Deck screws
Metal flashing
Power saw
Joist hangers, 90-degree and u-shape
Batterboards
Mason string
Chalk line
Level
Portable power mixer
Bags of ready-mix concrete
Power auger or shove


Instructions
-
1
Estimate the amount of wood required
First of all, you have to find the amount of wood you need to build the raised deck, and to do this you will have to make a plan or design for the deck.

-
2
Take the measurements
As you will be taking measurements, make sure that you leave out a few inches on the depth and height of each board, which is normally around ¼ inch.
-
3
Note down the measurements that you have taken and take them to the local home hardware store to make it easier for you to get all the supplies you will require for building the raised deck.

-
4
Getting a permit
It is advised to get a permit from your local municipality before buying the required materials because they might require a few details like; the type of wood you plan to use, the height of the rails and your plan for placing the required rails on stairs.

-
5
Attachment of ledger
Before you start building the raised deck it is good to attach a ledger board to the house, keeping in mind that a 14 x 24-foot deck would require a 2x12 ledger.

-
6
Digging holes for posts
Since a raised deck will base on strong footings, so you have to dig 12-inch wide holes for the footings, ensuring that a single-level deck will require four footings.
-
7
Erecting the posts
When done with digging the holes, insert the posts into the holes and make sure that they are at the same level.

-
8
Pouring the Concrete
After erecting posts in the holes, pour the concrete and check again to make sure that the posts are aligned. Wait for atleast 48-hours to allow the concrete to strengthen.

-
9
Trimming the tops
Once the concrete is all set, trim the top of the posts and reinforce them with wood and temporary joist hangers. After sometime, attach the permanent joists to the ledger, thus, preventing the joists from twisting by fastening block pieces between them.

-
10
Installing the Deck
As you are done with the above step, remove the temporary joists and prepare to install the decking. Over the joists, you will center the seams of the decking boards and spread them out in order to give the deck a desired outlook.

-
11
Fastening the Decking Boards
Tie up the decking boards with the help of deck screws such that the first row of decking is installed perpendicular to the joists, and the remaining rows are spread out.

-
12
Building the Stairs
Finally, build the stairs by first laying concrete pads at the base of the stairs about 4-inches thick. It is advised to install an already made stair package available at any home hardware store as you will only have to install the railings.


