How to Install Cork Floor Tiles
Corn flooring has started regaining the popularity it enjoyed decades ago. People are shifting to it because of it is a renewable natural product that is quiet to step on, warm to feel and easy to clean. The most important feature is that it looks great on the floor. Cork flooring comes in two options; one is the lick-together planks and the other is the glue-down tiles. Installing cork floor yourself is a great idea to save money and spend a worthwhile afternoon or weekend engaged in an interesting activity. it does ask for some preparation and patience. Have a look steps about how to install cork floor tiles.
Things you need:
– Cork tiles according to room measurement
– Cork adhesive
– Notched trowel
– Chalk line
– 100 lb roller
– Soft blow rubber mallet
– Measuring tape
– Sander


Instructions
-
1
Prepare the sub floor:
Cork can be applied over any sub floor be it cement or plywood. However, this floor has to be even. Use a self-leveling compound to fill out any cracks and holes. You can sand away any high areas. The sub floor should be totally dry before you start laying down the cork tiles.
-
2
Find the mid point:
Draw a straight line from the center of one wall to the apposite. Do the same for the other set. The lines will intersect in the center of the room at a 90 degree angle. This is your snap point. The snap point is your reference to tile pattern. The first tile is placed on the snap point.
Measure your room using the measuring tape and determine the quantity of tiles you are going to need by dividing the room area with the size of tiles available. Get some extra tiles to cover up for any waste or breakage.
-
3
Lay out tiles:
The chalk lines divide your floor into four equal parts. Start with one part. Apply adhesive to the floor and also to the back of the tile and press down the tile softly using a notched trowel. Use a rubber mallet to set the tile in place. Place the next tile at an angle to the first tile so that they fit neatly. Continue doing so, working from the center snap point towards the walls. Use a 100 LB. roller to press down the tiles after every hour.
-
4
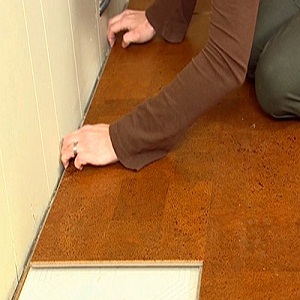
At the corners and borders:
When you approach a wall, measure the tile size you will need to fit neatly between the wall and the tile layers. Use a utility knife to cut the right size and lay it using the adhesive.
-
5
Sand away:
When done with laying the tiles, use a sander to even out small spots and ridges so that there is a uniform look and feel. Vacuum everything off when the floor gets dry.


