How To Make and Fill a Henna Applicator Cone
Women have long been using Henna to make designs on their skin. The best thing about using henna is that it is not permanent and lasts a couple of weeks at most, and after that you can move on to a new design. It is not even painful. You can easily find a henna applicator cone at the nearest store, and can make it at home as well.
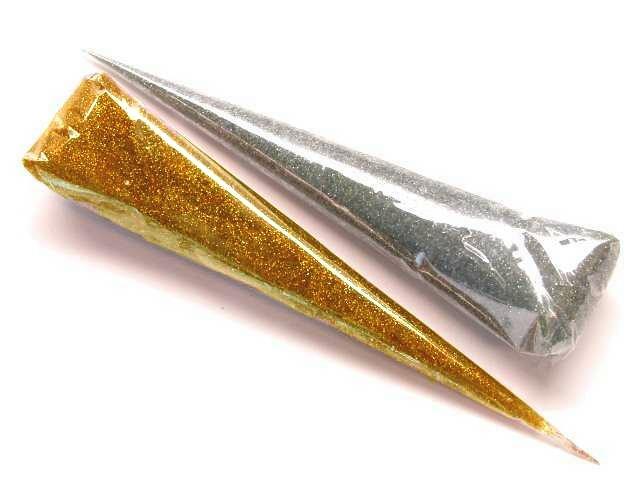
Cellophane, mylar, wax paper, plastic bag or a plastic wrapping used for delivering flowers are ideal materials to make a henna applicator cone. Just wrap the sheet made of any of the above mentioned materials into a triangle which is about 12 inches on each side. Roll one end of the triangular sheet towards the other shaping it into a cone. Fill this cone with henna using a carrot bag. Cut a very tiny hole into the tip to open it up, so that you can easily squeeze the henna out and apply it on your skin.
Things Required:
– Cellophane or mylar piece
– Carrot bag
– Premixed Henna paste
– Tape
– Paper Towel
– Scissor


Instructions
-
1
Take a piece of cellophane. You can also use mylar for making your Henna cone. Mylar is a material used in making of helium balloons.
-
2
Cut the cellophane in a triangular shape.
-
3
Hold it in your hand with one side of the triangle on your left index and middle finger.
-
4
Wrap it around your fingers and keep rolling until it gets the shape of a perfect cone with a pointed tip that is closed. Make sure that your cone is nice and straight.
-
5
Put a piece of tape right along the seam to seal the cone.
-
6
Your henna applicator cone is ready.
-
7
To fill the henna cone, we will need a carrot bag.
-
8
Put the henna into the carrot bag carefully, making sure that no henna goes down the sides of the bag.
-
9
Cut the tip of the carrot bag and put it inside the henna cone you just made, making sure that the tip of the bag is near the tip of the cone.
-
10
Squeeze out a bit of henna and using your fingers, press that down to the bottom.
-
11
Fill up the cone gradually, making sure that there are no air bubbles in the cone.
-
12
Don’t fill the cone too high to the top.
-
13
Now fold the open end of the cone to make a small triangle. Tuck the edges up and fold it down, making sure no henna can escape when you squeeze it. Put a piece of tape here to seal the cone.
-
14
Your henna applicator cone is ready.


