How to Get Started In Infrared Photography
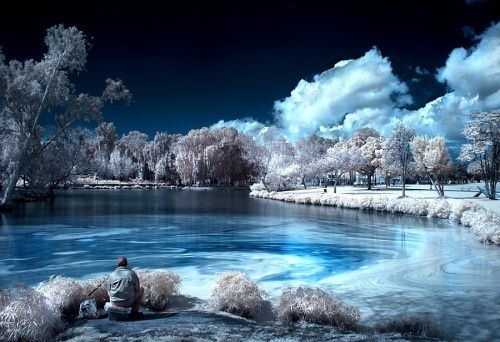
Infrared Photographs have a charm of their own. The colours that these photographs are able to exhibit are simply marvelous. A person who has photography as a hobby can’t simply not experience capturing these breathtaking photos. However, in order to capture these photographs you need a high quality digital camera upon whose lens you can mount a filter known as the Infrared filter. These filters help you in capturing infrared images, which can serve as a great addition to your portfolio.


Instructions
-
1
The first and foremost thing you need to do is to obtain an Infrared Filter for the digital camera’s lens that you’re currently using. This particular filter specializes in blocking almost every kind of light, allowing only the infrared lightwaves to pass through this filter. This in turn, allows your camera to capture the infrared lighting, which is almost impossible to be seen from the naked eye.
-
2
Infrared photography requires you to switch to a manual mode as they cannot be shot in an automatic mode. Cameras are not programmed to shoot these pictures in other modes. Therefore you'll need to switch to the 'M' mode, which represents the manual mode.
-
3
You'll need to increase the aperture to the it's maximum. The aperture is represented by 'F' in most of the cameras. Set the aperture to at least F18 if you want to capture infrared photos. Doing this would allow you to let only the infrared lightwaves to be captured via the sensor.
-
4
Increase the shutter speed to maximum of your camera to its maximum. In most cameras the maximum shutter speed is 15 to 30 seconds. However, in some cameras there's also function known as the 'Bulb' which allows you to let the shutter open for as long as you hold the shutter button. This allows the camera to capture infrared photographs.
-
5
Compose the picture by setting the frame. Remember that you’ll have to use a tripod stand for taking the picture. Frame the picture in such a manner that the final output will present a decent composition.
-
6
Press the shutter button and capture the photograph.
-
7
Once you’ve taken the photograph the next phase is to post-process your infrared photography. Of course the filter helped you in capture these one of a kind lightwaves, however you’ll have to use image-processing software for the colour toning of the picture that you’ve taken. Post-processing has significant importance in photography as it helps you in presenting the picture in your desired colour-treatment.


