How to Install a Recessed Light
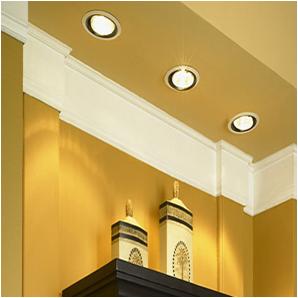
The installation of the uniquely designed recessed lights is a surprisingly inexpensive way to update the look of your home or offices. The recessed lights are hidden as they are installed in the ceilings. As a result of it, your rooms feel more boundless and open.
Now if you are planning to install a recessed light, then you might be worried about the shredding out of your whole ceiling to fit it. Fortuitously you don’t have to do it as this article contains the simple procedure of installing the recessed light with a minimal drywall tear out and patching.
Things Required:
– Recessed light
– Stud Finder
– Wire clamps
– Wire strippers
– Wire nuts
– Drywall saw
– Utility knife
– Pen or pencil
– Tape measure (for laying out your light locations)


Instructions
-
1
Trace a circle
Take the template that comes with recessed light’s package, place it on the selected location and use a lead pencil to trace all the way around it.
-
2
Make a shallow-cut
Use a sharp utility or putty knife to make a shallow-cut all around the round mark.
-
3
Cut radius lines
Now cut radius lines right from the center of the hole to the edges, using a sharp and pointed drywall-saw.
-
4
Push up the dry wall
Gently push up each piece of the dry wall and use a utility knife to cut their paper baking loose.
-
5
Smooth the edges of the hole
Smooth the edges of the hole and remove all the lumps, using a drywall saw.
-
6
Remove the plastic insulation
Drag cable from the power source to the first recessed light and use a wire-stripper to remove the plastic insulation from the ends of the black and white wires.
-
7
Loosen recessed light’s fixture
Insert a flat bladed-screwdriver into the new recessed light fixture and move it in and out for few times until one of holes loosen and pops out into your hands.
-
8
Insert wire into the hole
Now put in the wiring clam into the hole you just opened up and twist on the retainer nut until tight.
-
9
Tighten the screws
Insert the wire through the clamp and tighten the screws to tightly keep hold of the jacketed wire. -
10
Add wire nut to the white leads
Seize the two white leads uniformly together, place the wire nut over the end and twist it until it stops once it touches the end.
-
11
Push wiring into switch box
Now tuck all the wiring back into the switch box and push inside until fits nicely.
-
12
Adjust switch box’s cover
Snap the switch box’s cover in the right position, tabbing the slips into the clot and using spring clip to hold it in place.
-
13
Study the internal side of the recessed light
Study the internal portion of the recessed light so that you can set it thoroughly. The horn shaped tab will be used to mount the baffle and the black clip will be used to retain the recessed light. The clips around the light are for the adjustment of various depths of drywall.
-
14
Insert wiring into the ceiling’s hole
Carefully insert all the wiring (attached to the light) into the hole in the ceiling.
-
15
Insert recessed light’s fixture
Now inset the light until fixture is flush with the ceiling.

-
16
Pot the Main Clip Down
Hold the clip of the light and gently pop it down a bit in order to unlock it from the fixture and locks thoroughly. Repeat the same procedure for the remaining clips around the internal side of the recessed light.

-
17
Add a Baffle
Your recessed light project is almost done; add one of your favorite baffles and enjoy the recessed light.

Next%20stop%3A%20Pinterest "Pin It")


