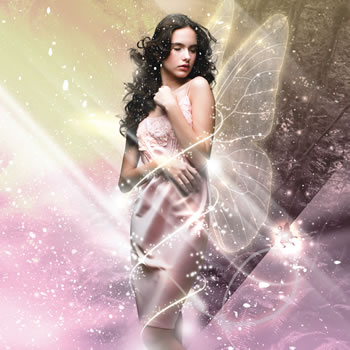
How to Make Fairy Dust in Photoshop
Photoshop is a powerful photo editing tool used by graphic designers and professional photographers around the world. The software, developed by Adobe, provides powerful effects and filters which can be used for image manipulation and tweaking. The software allows users to create their own patterns or use pre-built ones in the form of brushes. If you are looking to give your images or photos a touch of fantasy, you can easily use Photoshop to add fairy dust.


Instructions
-
1
If you don't already have an image to work with, you can use the tools in Photoshop to sketch, draw or paint something. However, for best results, it is recommended that you use a high resolution photograph or image.
-
2
Fortunately, Photoshop provides users the luxury of using layers, which technically allows them to work on top of the source image, without making permanent changes in it.
Before you add any effects, you should click the 'New Layer' option in the bottom right corner of the screen. -
3
In order to add fairy dust to your image, you will need a brush. You can select the brush tool by pressing the B key or using the toolbar on the left.
Once you select the brush tool, a brush palette (a bucket with a couple of brushes in it) will be visible on the right edge. The brush palette box allows you to modify the parameters of your tool to suit your requirements. -
4
In order to modify your brush tool, select the Brush Tip Shape option. The bottom of the palette box should now allow you to select 'Spacing', which refers to how close together the tip or brush will be. Depending on your preferences, you can drag the slider to adjust the brush's spread.
-
5
Now turn towards the 'dynamics', where you can adjust ‘Size Jitter’, which will give your fairy dust a more natural look. Increase the jitter, along with scattering and count, which will modify the number of dots your pattern will have.
-
6
You are now ready to start painting over your image. Hold the brush or cursor where you want to add the fairy dust. As you had adjusted the spacing in the earlier step, the dots should not be too scattered, allowing you to focus on specific areas.
-
7
Once you have added the dust, you will need to give it a natural glow. This can be done by adjusting the layer style. Hit the fx button at the button and choose the outer glow option. Depending on your preference, you can change color, blend mode etc to vary the appearance.
-
8
If you want to add more detail to your fairy dust you can use Photoshop's lighting effects. Before you start, create another new layer. Look for the gradient option (press g or select from the toolbar on the left) and depending on your preference, select either linear or circular gradient.
Select an appropriate color for the light, depending on your photo and use the gradient tool to draw a path on your image which will be highlighted by the software automatically. If you think the light is too bright, you can select soft light from the layer tools option.


