How To Make Table Cards
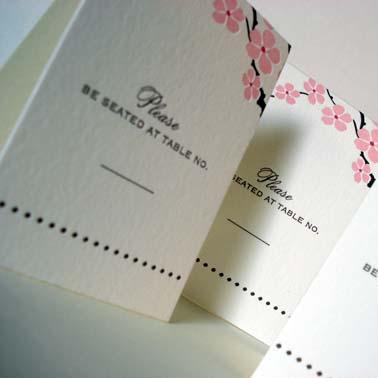
Table cards, also known as Escort cards, come in numerous forms. Table cards add an artistic touch to a particular occasion. When a guest walks in, a table card guiding him to his place looks pleasing to the eye. It is a common practice to display table cards right next to the entrance to the seating area and these cards usually include each guests name and their table assignments.
It is very easy to make your own table cards instead of purchasing them. If you make your own table cards, you can use colours and patterns of your choice to match the theme of the event for which the table cards are being made. You just need to do a little printing, cutting and assembling.
Things Required:
– Printable text weight paper
– Decorative paper
– Cover weight paper
– Scissors
– Computer
– Coloured printer
– Adhering tape
– Coloured ribbon or fresh flowers
– Hole Punch


Instructions
-
1
The table card you are going to make will comprise of three layers of paper, top layer being the printable text weight paper, middle layer being the decorative paper and the bottom layer being the cover weight paper.
First, you need to print the top layer. Determine what size the table card will be after it is complete. Cut the three paper layers according to the determined size. While cutting, keep each layer around 1/4 inches smaller on all sides than the previous layer, starting from the bottom. -
2
Now you need to start working on the top layer. Gather information such as each guest’s name and table assignment. Using any word processing, for instance Microsoft Word, create a format. Print the top layers of all table cards using the coloured printer. Preferably use 8 1/2" x 11" text weight paper. It is a good idea to print a few samples on scrap paper before printing the actual top layers.
Image courtesy: lcipaper.com
-
3
Cut each printed top layer to size.
-
4
Now it comes to preparing the middle and bottom layer. Select the ideal decorative paper for middle layer and ideal cover weight paper for bottom layer of the table cards.
-
5
It is now time to assemble the table cards. Use a xyron machine to adhere the top layer to the middle layer. If you do not have a xyron machine, you can use simple adhering tape. Adhere together this combined layer and the bottom layer.
Image courtesy: edcheung.com

-
6
Finally embellish the table card using a coloured ribbon or a fresh flower. Use a ribbon if you are preparing the table cards days before the event is to take place. If the event is to be held the next day, use a fresh flower.
Image courtesy: veilubridal.com

