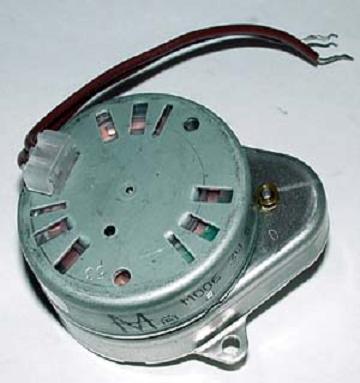
How to Test a Dryer Timer Motor

Dryers have indeed made life significantly easier for millions of people around the globe, as they no longer have to rely on the sun or moving air to dry clothes after doing the laundry. Like any other machine, dryers are typically made up of a number of components, one of which is a timer motor. It basically keeps tabs on the amount of time for which the drying cycles will run during the use of a dryer.
A dryer’s timer motor does not go bad too often. However, if your appliance is malfunctioning, then it may be a good idea to still test the timer motor in order to ascertain whether it is or isn’t the source of the problem.
Things Required:
– Dryer
– Multi-tester
– Screw-drivers
– Tower
– Needle-nose pliers
Instructions
-
1
The first thing that you need to do is switch off your dryer. This is important so that you do not end up getting an electric shock during the process. To completely cut the power to the appliance, take its plug out of the socket, or turn off the circuit breaker that delivers electric currents to it.
-
2
Next, look for the timer on the dryer’s control panel. You will basically be searching for a dial with a large set of options such as “normal dry” and “optimum dry”, as well as numerical time indicators on it.
-
3
Once you have located the timer, grab a screw-driver and open the control panel by removing the screws, which will typically be located on the top or back of the control panel. To prevent the finish of the dryer and control panel from getting scratched, place a towel on the dryer and place the control panel face-down on it.
-
4
Look closely at the motor control of the timer. You will notice a number of wires connected to it. Look for the wires that deliver power to it. These wires will be typically larger than the other wires, thus allowing you to recognise them without any trouble. Remove one of the power leads from the timer motor control using the needle-nose pliers. Make sure you pull on the connector to disconnect it from the terminal instead of pulling on the wire, as doing the latter may cause the wire to break.
-
5
Set the dryer’s timer to “normal dry” after lifting the control panel up.
-
6
Now grab the multi-tester and set it to read ohms. Touch or connect one probe of the multi-tester to the terminal on the dryer timer motor from which you unplugged the wire and then touch the other probe to the other terminal, which still has the wire connected to it.
-
7
The reading on the multi-tester should be zero. If the reading is higher than zero, then the timer motor is bad and consequently should be replaced.


