How to Assemble a Bike Wheel
When you don’t purchase a bike directly from a bike shop, there are quite high chances that it not completely assembled when you receive it. The front wheel, along with many other bicycle parts, is detached so that the bike can be tightly enclosed in the delivery box and you have to assemble those parts. To assemble the front wheel of a bike it not at all a difficult job to perform and you can easily do it with few tools at your home and few minutes to spare.
Instructions
-
1
Turn the bike upside down on its handle bars and seat. This will make it easier for you to assemble the wheel. However, you can also mount the bike on stools or any other appropriate support to perform the assembling work.
-
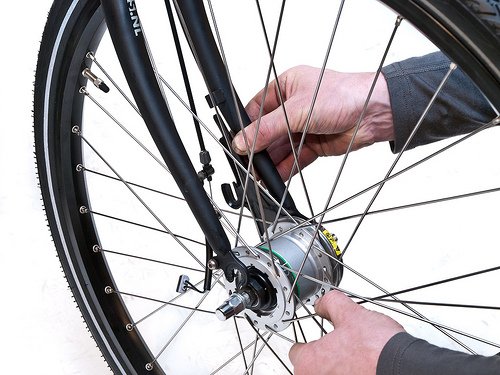
2
Start with loosening the nuts present or the axle skewer on the wheel of the bike. Many models of bikes have nuts present on both sides of the axle. However, some newer models come with axle skewer, which goes through the axle and has a fixing nut on the other side. You need to open it up for placing the wheel.
-
3
Rotate the wheel, as the tire treads needs to face the appropriate direction before fixing them on the bike. All wheels have a stamp mark of the manufacturer on one side of them, which also includes the inflation specifications as well. Before assembling the wheel, make sure this side of it faces right or the drive-side of the bike.
-
4
Now you have to put in the axle. You will see two notches on the tips of the fork and these are known as the ‘dropouts’. The axle will be fitted into these dropouts.
-
5
If you feel difficulty in fitting the axle into the dropouts, loosen the axle nuts a bit and then try again.
-
6
Once the axle is perfectly fitted into the dropouts, you have to fully tighten up the axle nuts or skewer. An adjustable wrench will serve the purpose excellently. Rotate the nuts clockwise until they touch the fork.
-
7
As for tightening the skewer, you have to hold the quick-release lever in its actual place and then tighten up the nut on the other side of it.
-
8
Once you have finished the assembling, you should test the bike by bouncing its front wheel in the ground. If a rattle sound if heard from the axle or wheel, it indicates that the nuts have not been tightened properly.
