How to Drill a Drainage Hole in a Container
If you have just some experience with plants, you would know the importance of a drainage hole in a pot or container in which a plant is growing. The drainage hole prevents water for accumulating at the bottom of the container which can effectively kill a plant within days. Drilling a drainage hole in a container is a very easy task and does not require any specialised tools. Moreover, this task should not take up too much of your time.
Things Required:
– Electric drill
– Drill bits
– A nail
– Gloves
– Safety glasses
Instructions
-
1
Start by covering a hard level surface such as a table top with a piece of cardboard. Take the pot in which you want to drill the hole, turn it upside down and place it on the piece of cardboard.
-
2
Now you need to mark the point where you want to drill the hole. For this purpose, make a nick at the bottom of the pot while it is resting on the piece of the cardboard. Use a nail for this purpose. The nick you make would ensure that the drill bit does not slip while you are drilling the drainage hole in the bottom of the pot.
-
3
Depending on the type of material which was used to manufacture the pot, choose an appropriate drill bit. For materials such as glazed ceramic and terracotta, a tile or ceramic drill bit would work best. For materials such as wooden, zinc or galvanized metals, you can use a normal drill bit.
-
4
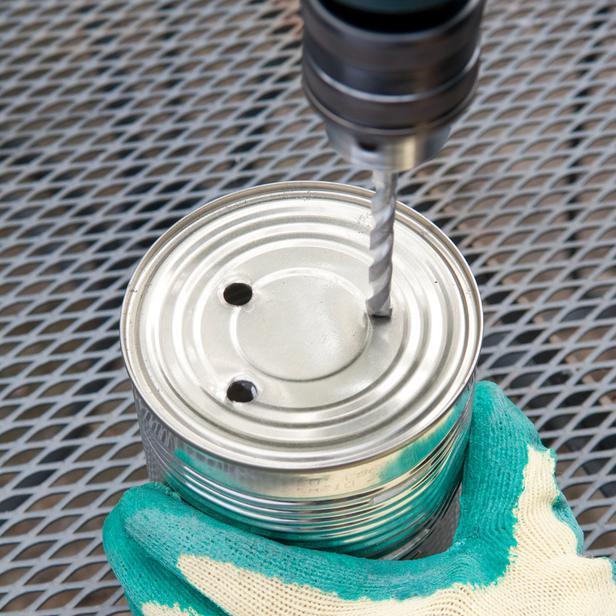
Attach the appropriate bit to the electric drill. Place the bit in the nick in such a way that the bit is perpendicular to the bottom of the pot. Drill the drainage hole in a single, instant motion. Be sure to keep the drill bit perpendicular to the bottom of the container. If the container through which you are drilling the drainage hole is made of zinc or any other metal, it would be better to drill a smaller and shallower hole first with a relatively small drill bit and then bore through the bottom of the container with a relatively larger drill bit.
-
5
Blow off debris which was created during the drilling process. Flip over the pot and allow it some time to cool down because the bottom of the container may be hot from drilling. You may want to drill more holes. If that is the case, simply repeat all the steps once again.
