How to Lay a Brick Sidewalk
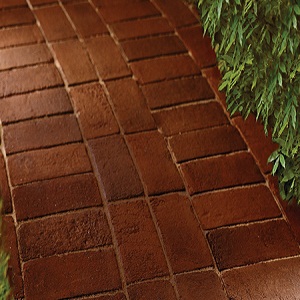
Brick sidewalks are an attractive way to cover up any path. They merge with the natural scenery and are an inexpensive way to introduce visual appeal to a place. Apart from that they are very durable and as good as a stone sidewalk. This makes bricks as one of the most used material for pathways. A brick sidewalk is easy to install and can be done by any determined homeowner who has a vacant weekend. The process is very simple and has been made easy in our guide below.
Things required:
– landscaping paint or two ropes
– Shovel
– Tamping tool
– Gravel
– Edge restraints
– 9-inch nails
– Course sand
– Board
– Bricks
– Fine sand
– Broom

Instructions
-
1
Dig up:
Mark on the ground the outline of your brick path. Decide its length and the width of it. A sidewalk 4 feet wide is enough to accommodate people and wheelchairs. Use chalk or paint to mark the area. A thread or string will also do. A long garden hose can also help you lay the outline. Straighter side walks are easier to install while curved ones require you to cut the bricks. Remove all the weeds from the area. It is better to spray with a weed killer. Decide on the pattern of bricks that you want to install.
Once you have marked your path, dig it out up to six inches. Remain inside the borders. Use the flat back of a shovel to flatten the edges and base of the sidewalk.

-
2
Edging:
Use steel edging to border the sidewalk. Use a hammer to pound these strips into the earth. The edging will keep the bricks in place and make out the permanent shape of your sidewalk. Drive 9-inch nails through the strips into the ground to secure them.

-
3
Compress base:
Use a hand tamping tool or a plate compactor to press the bottom of the path you created. Apply a 4 inch layer of gravel to the base. Spread it evenly and tamp it down well. This will compress the soil in to a hard base for the bricks.
-
4
Apply sand:
Pour a 1 inch layer of sand into the now compressed trench. Level off the sand using a straight wood board that you slide up and down the trench to even out sand layer. The sand covers up the gaps that the bricks leave.
-
5
Set bricks:
Start laying down bricks along the edging. Set bricks snugly across each other. The bricks should be at level with each other. You can use a carpenter's level to achieve that. For higher bricks, tap them down with a rubber mallet. For lower ones, increase their height by adding sand under them. All in all the bricks should be at the same level.
If you need to cut bricks, use a circular saw to cut to the required size.
After you are done laying the bricks, pour sand over them and brush it over to cover the gaps between the bricks. The sand ensures that the bricks keep in place and fit snugly.


