How to Set up an Account on Android (Exchange 2010)
You can use some very interesting features on your Android-powered device (smartphone or tablet). Furthermore, you can also use the applications which are present at Android Market as per your requirements.
One of the most interesting software which you can use on your Android device is Microsoft Exchange Server. It is one of the widely used software which has been developed by Microsoft. Besides, it helps in managing your mails, calendar and contacts. You can easily add your Exchange account to your Android so as to use it to fulfil your needs.
This article contains the necessary steps which you need to take to set up your Exchange 2010 account on your Android. Moreover, the procedure has been explained in a very simple manner so that you can follow it easily.


Instructions
-
1
First, you have to unlock your Android device. Then, go to your main menu.
-
2
Press the menu button and you will see some options on your screen. Select ‘System Settings’ options. Then find and select the ‘Accounts & sync settings’.
-
3
When you will open ‘Account & sync settings’, you will see an option ‘Add account’, tap it.
-
4
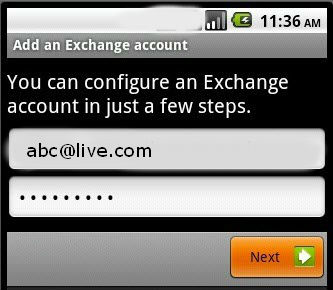
Now, it will ask you to enter your email address and your password. Enter your account’s details in the specific fields and then tap ‘Next’.
-
5
Then, you will have to enter your email address again in the username field (your password will be already entered in the respective field).
-
6
You have to enter the Server address in the Server field.
-
7
You will have to check the boxes ‘Use SSL’ before pressing ‘Next’.
-
8
After pressing ‘Next’, press ‘OK’ in the Remote security administration window.
-
9
Now, press the ‘Automatic push’ and select how far back you need to sync in the Amount to synchronise the field.
-
10
You can give your screen name to your newly added account (if you want to) in the ‘Give this account a name’ option.
-
11
After entering your name, just press ‘Done’.
. Furthermore, you can also use the applications which are present at Android Market as per your requirements.
One of the most interesting software which you can use on your Android device is Microsoft Exchange Server. It is one of the widely used software which has been developed by Microsoft. Besides, it helps in managing your mails, calendar and contacts. You can easily add your Exchange account to your Android so as to use it to fulfil your needs.
This article contains the necessary steps which you need to take to set up your Exchange 2010 account on your Android. Moreover, the procedure has been explained in a very simple manner so that you can follow it easily.Next%20stop%3A%20Pinterest "Pin It")


