How to Make Snowman from Cotton
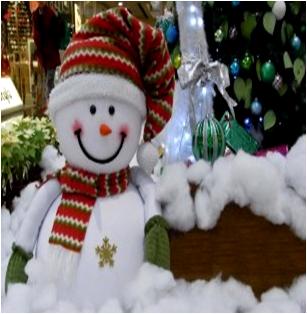
You do not need to wait for snowfall or to go to snow receiving areas to enjoy making a snowman as you can make it home as well. Yes, you can make your snowman using few cotton balls. The adorable cotton snowball is not adults’ favorite craft but an amazing opportunity for kids to show their hidden artistic capabilities. We might not be wrong to call it as a “Family Activity” as it provides both parents and kids with an opportunity to spend good time with each other. A part from fun, knowing the art to make snowball from cotton can help your children to impress the crafts enthusiasts during various craft competitions.
You can use the handmade cotton snowman crafts in the decoration of various items, especially the Christmas trees and ornaments. So, are you all set to make your own snowman from cotton? Here we go…..
Things Required:
– Cotton Balls
– Tissue Paper
– Hair Spray
– Iron
– Styrofoam Balls
– Craft Glue
– Hot Glue Gun
– Scissor
– Needle
– Thread
– Black Chart Paper
– Sewing Pin
– Black Roller Ball Pen or a Marker
– Tan Piper Cleaner
– Pair of Scissors
– Yarn
– Punch Machine


Instructions
-
1
Take few cotton balls and pull them apart in order to convert them into flat pieces. Now lightly sprinkle them with a hair spray on both sides and set them aside until dry.

-
2
Place the dry cotton balls on tissue papers and iron them with medium heat range. It will act like a starch on the cotton balls, making them smoother and firm.

-
3
Pick some Styrofoam balls and lightly twist one of their sides on a table or hard flat surface in order to make them slightly flat. It will help in adjoining the two Styrofoam balls together. The larger ball will be the body and the smaller one will be the head of the snowman.

-
4
Apply some craft glue to the head portion of the snowman and carefully place one of the ironed cotton balls over it. Repeat the same procedure to apply glue and add the ironed cotton ball to the body portion of the snowman.

-
5
Now smooth the cotton as best as you can in order to give a smooth finishing touch to the head and body of the snowman. Lightly sprinkle the snowman with some hairspray and leave to dry completely.

-
6
Until then you can make the hat of the snowman. Take a black chart paper and cut a rectangle piece out of it. Now cut two circles with a diameter of 8/9" and 2" out of it, using a circle template or craft punches. Gently roll the rectangular piece of paper to a diameter of 8/9" and secure it with craft glue.

-
7
Stuff the interior of the snowman’s hat with some tissue papers and use a hot glue gun to add the big circle to the top and small one to the bottom.

-
8
Use the same hot glue gun to attach the hat to the top of the head of the snowman.

-
9
It is the time to make the face of the snowman. Take a black cardstock scrap or the reasoning pieces of the black chart paper and punch four regular size eyes out of it.

-
10
Add the two circles right below the hat of the snowman to act as two eyes, as shown in the image on your right hand side.

-
11
Now stick in the sewing pin as a nose of the snowman. It is better to insert the sewing pin with its tip in the downward direction so that it does not stick out of the backside of the snowman's head.

-
12
Glue some small colorful buttons or the black circles on the body of the snowman, using craft glue and let then dry completely.

-
13
Draw a smiling face for the snowman, using a fine quality black roller ball pen or a marker.

-
14
Carefully wrap a tan piper cleaner right around the back side of the snowman's neck in order to act as its arms. Glue them down with craft glue.

-
15
Grab a piece of your favorite yarn and wrap it around the snowman's neck in order to act as its scarf. Now knot the thread the yarn and trim off the excess with a pair of scissors.


