How to Set Up a New Mail Account on an IPhone
Technology has changed things entirely. With the latest Smartphones, one does not need a computer to check emails. For businessmen, it is extremely important to check emails regularly, but when travelling it becomes impossible for them.
To avoid such problems, iPhones offers you the facility of setting up a mail account. Manufactured by Apple, this Smartphone is pretty useful, when it comes to sending or receiving emails.
It is a pretty simple procedure to configure your phone to send and receive email messages. Only a few moments are required to set up a new mail account on your iPhone.
Things required:
– iPhone Running v2.0+
– ISP’s mail settings


Instructions
-
1
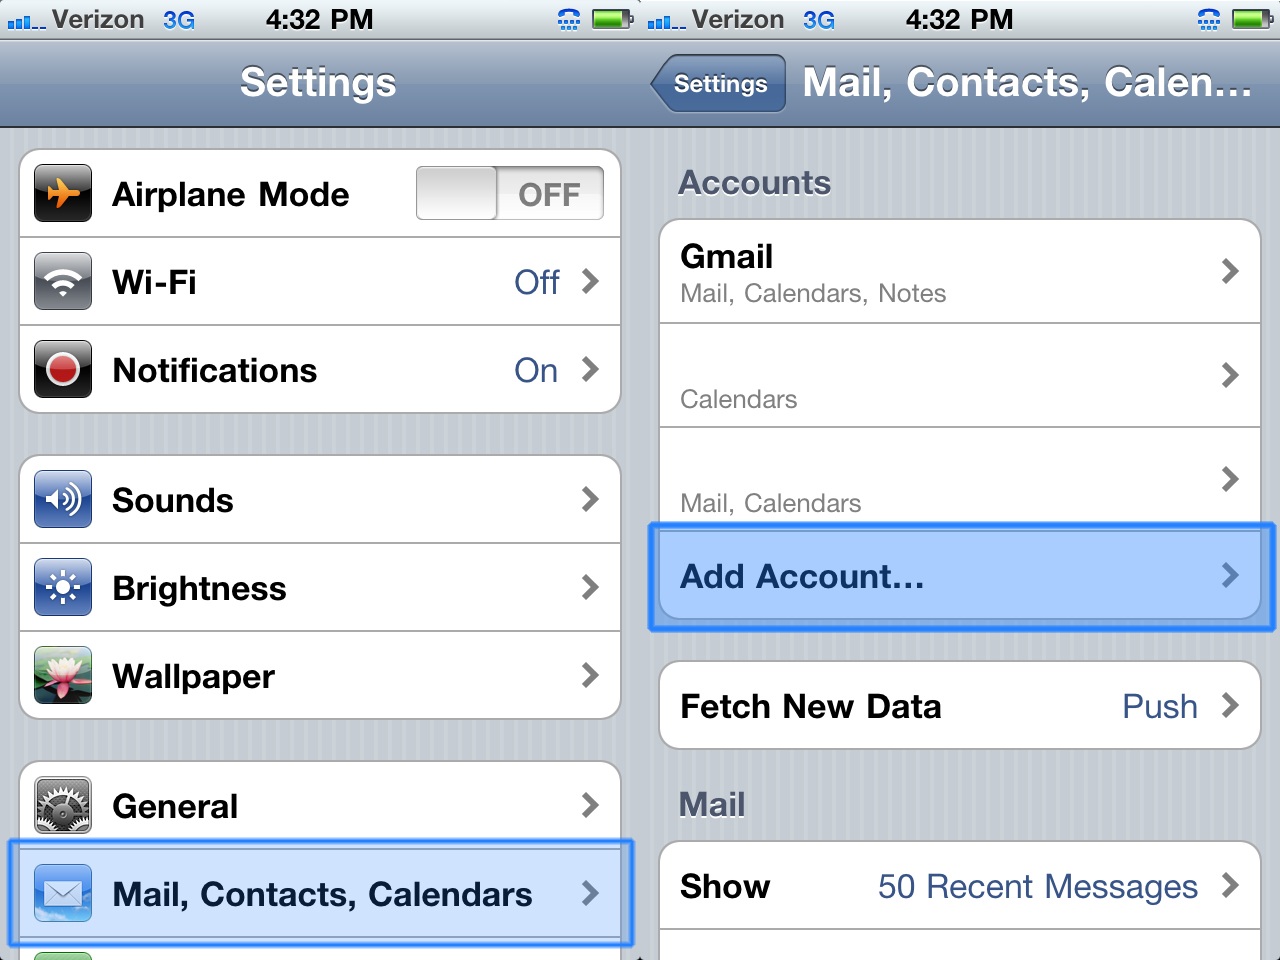
After opening the main settings, choose the "Mail, Contacts, Calendars" feature. You will find the icon on the bottom of the screen.
-
2
Click the ‘Add Account’. The phone will ask you to choose the account that you want to set up. Among the options are: Microsoft Exchange account", "Mobile Me", "Gmail", "Yahoo! Mail", "AOL mail" or "Other". In order to set up an ISP mail account, choose ‘Others’.
-
3
The next step is to enter the details. You will be asked to type your email address, password and brief description of the account. After adding the relevant information, click the ‘Save’ button.
-
4
Now, your phone will take some time to verify the information. It may take some time, depending on the speed of your Internet. After the verification process, the iPhone will bring you back to the ‘Accounts’ screen. A list of added account will appear in front you. Choose the one that you have just created.
-
5
To enter the "Outgoing Mail Server" information, you need to scroll down. A type of outgoing mail server, SMTP can be used by the iPhone users while on Edge or 3G.
-
6
After selecting the "SMTP", you will see another new screen, where you need to choose the AT&T SMTP Server option. To activate the service, push the ‘ON’ button. The ‘OFF” button is to deactivate the service.
-
7
Having turned the service on, you are just one step away from setting up a new account. The final step is to return to the previous screen. To do so, push the ‘SMTP’ button that you will find near the bottom of your iPhone screen. A new account has been successfully created.